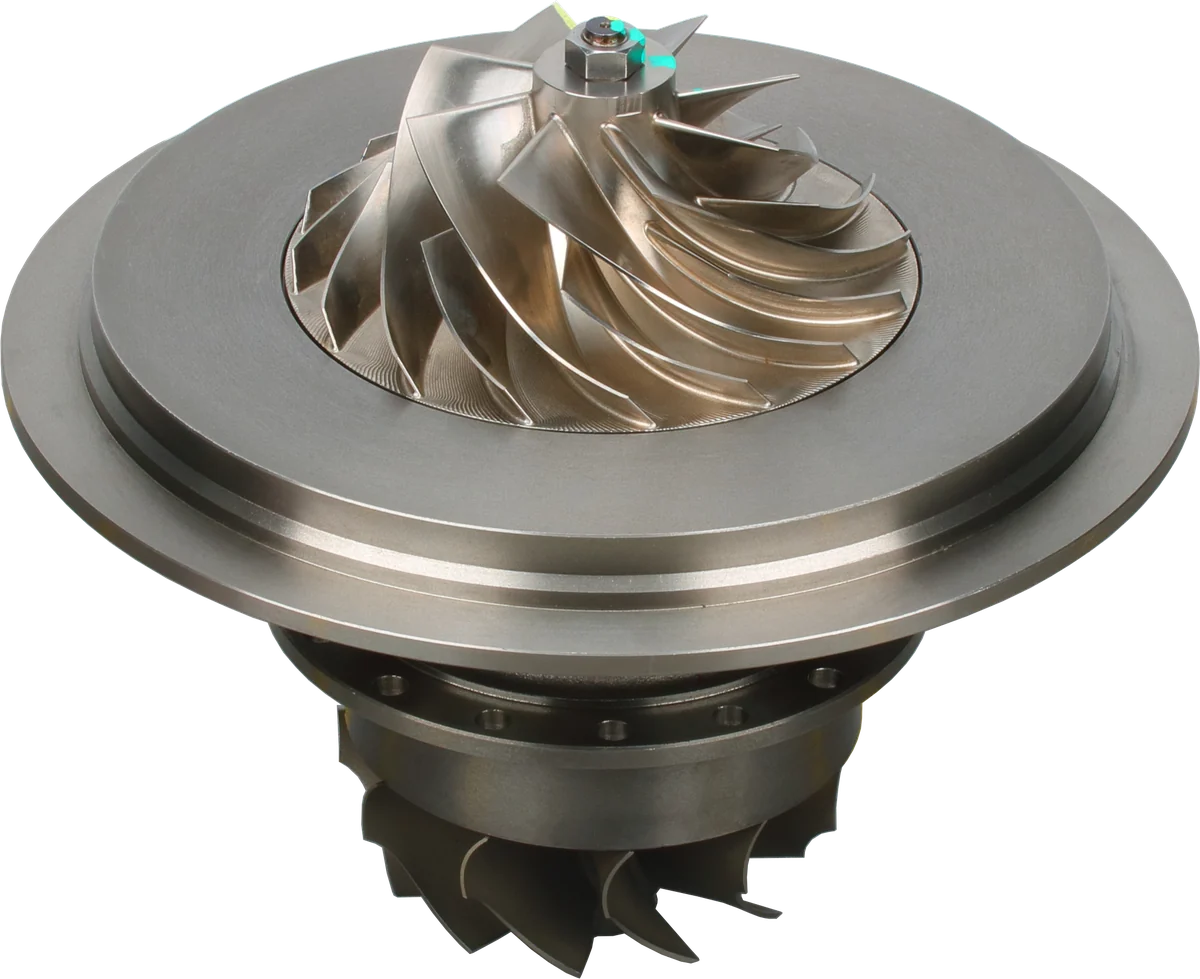
A repeat turbo failure makes the replacement part an obvious suspect. A defective unit is possible, but the first suspect should usually be the untreated condition that destroyed the previous turbocharger. Replacing the assembly does not clear a restricted oil passage, remove every metal fragment, or repair excessive crankcase pressure.
The useful question is: What damaged this turbo, and what evidence shows that problem has been corrected? Work through the whole system before committing to a third unit.
What to check if your replacement turbo failed
Low boost after turbocharger replacement does not automatically mean the rotating assembly has failed, nor does smoke or a new whistle. A loose charge-air connection, actuator fault, or restricted oil drain can produce symptoms soon after installation.
Start with the turbo failure diagnostic guide and preserve the initial evidence:
- Record mileage, installation date, and when symptoms first appeared.
- Save diagnostic codes and freeze-frame data before clearing anything.
- Inspect accessible wheels, housings, connections, and oil plumbing.
- Identify whether symptoms began at startup, when hot, or under load.
Stop running the engine if there is grinding, suspected wheel contact, substantial oil ingestion, or an oil-pressure warning. Do not perform another loaded road test simply to reproduce an already serious failure.
Lubrication: Check Supply, Cleanliness, and Oil Condition
Many turbocharger bearings depend on a continuous supply of clean oil. Rotation develops a supporting oil film between moving surfaces. Inadequate supply or unsuitable oil conditions can allow contact, heat, and rapid wear.
Oil starvation: Investigate restricted feed lines, blocked fittings or screens where fitted, incorrect gaskets, and engine lubrication faults. A normal dashboard indication does not establish adequate supply at the turbo. Check pressure at the specified test location and verify delivery using the applicable service procedure.
Oil contamination: Bearing particles from the previous failure may remain in oil passages or associated components. Changing the oil and filter is necessary, but it may not resolve contamination trapped elsewhere. Determine the required cleaning or replacement scope from the failure findings and engine service instructions.
Hard particles can score bearings and become embedded in softer bearing material. Those particles can then damage the shaft, creating more debris and accelerating wear.
Wrong or degraded oil: Use the engine’s specified viscosity and performance approval, together with any applicable turbo installation requirements. Oil that is too thick for the operating conditions can hinder delivery; oil that is too thin can reduce film protection. A thicker grade is not a repair for worn bearings or fuel dilution.
Debris and oil in the intercooler: Inspect the complete charge-air path after compressor damage or substantial oil leakage. During normal airflow, retained intercooler debris travels toward the engine, rather than directly into the turbo’s oil bearings. It still requires removal. Replace components when approved cleaning cannot reliably remove fragments or accumulated oil.
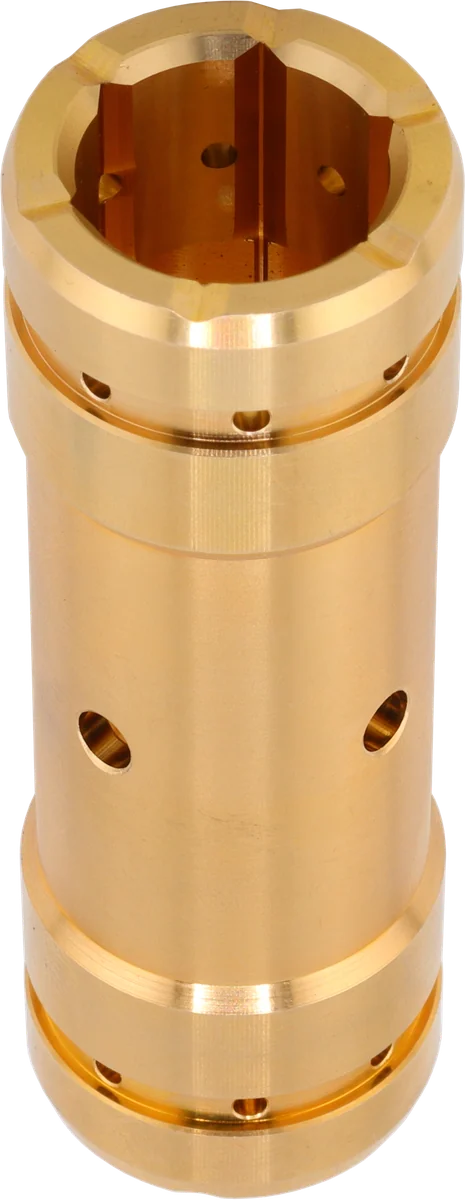
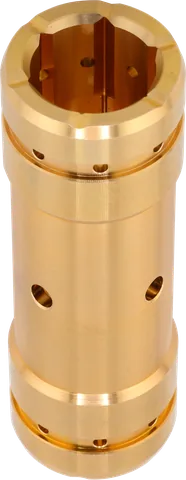
Bearing bore: the inner oil film supports the shaft.
Oil passages: keep the lubrication path clear.
Outer bearing surface: inspect the fit and condition.
Product photograph from 2026. Numbers identify the features explained below.
Installation: Small Errors Can Defeat a Good Turbo
A replacement can be damaged before its first meaningful road test if lubrication has not been established.
- No priming: Follow the supplied procedure for lubricating the bearing housing and establishing oil delivery before startup. Do not substitute immediate starting and revving.
- Sealant in oil passages: Excess liquid sealant or thread material can obstruct a feed or drain. Use the specified seals and apply sealant only where the instructions explicitly require it.
- Reused gaskets: Distorted seals can leak, and an incorrect gasket can partly cover a passage. Renew required gaskets and sealing washers.
- Reused lines: An old feed line may contain internal deposits even when its ends look clean. Renew lines when required, or when their condition cannot be established.
- Restricted drain: Check for kinks, deposits, incorrect routing, and a gasket that intrudes into the opening. Follow the required bearing-housing orientation.
Oil must leave the center housing as well as enter it. Drain restriction can cause oil to escape toward the compressor or turbine without initially proving an internal bearing defect. The turbo oil leak guide explains this distinction.
Also check coolant connections where fitted, mounting alignment, and fastener torque. Plumbing or exhaust components should not require force to line up with the replacement.
Intake and Exhaust: Look Beyond the Turbo Flanges
Foreign object damage, leaks, and restrictions can persist through multiple replacements.
Inspect the intake from the filter housing to the compressor. Look for loose hardware, damaged filter seals, deteriorating ducts, and material left during repairs. On the turbine side, investigate upstream engine or exhaust damage if impact marks are present.
Inspect downstream components too:
- Pressure-test charge-air plumbing using the vehicle’s approved method and test limit.
- Check for collapsed hoses and restricted filters.
- Inspect the intercooler for damage and retained contamination.
- Test suspected exhaust or aftertreatment restrictions using service specifications.
A charge-air leak can lead the control system to demand more turbo output while measured boost remains low. Under those conditions, shaft speed may become excessive even without an obvious high-boost reading. An exhaust restriction can alter operating pressures and temperatures.
Damaged blades establish that something happened to the wheel; they do not always identify where the damaging material originated. Compare impact locations with the surrounding intake and exhaust evidence.
Control and Engine Condition: Fix What the Turbo Cannot
A correctly fitted turbo still needs compatible control hardware and a healthy engine.
For VGT systems, verify actuator compatibility, linkage operation, wiring, and any required calibration or relearn. Some assemblies arrive calibrated; others require an installation procedure. Do not assume every actuator swap is plug-and-play, or adjust stop screws to compensate for a fault.
For wastegate systems, inspect hoses, solenoids, linkage, and actuator operation. Compare commanded and actual boost, checking sensor plausibility before blaming the turbo. Investigate overboost and disclose any tuning or control modifications. The wastegate and VGT guide provides background.
Engine checks are equally important when investigating repeat turbocharger failure on diesel engines:
- Crankcase pressure: A restricted ventilation system or excessive blow-by can oppose turbo oil drainage. Measure pressure under the specified conditions.
- Fuel dilution: Fuel entering the oil can reduce viscosity and bearing protection. Investigate a rising oil level or other signs of dilution; laboratory analysis is more useful than smell alone.
- Underlying wear: Poor engine oil pressure or excessive blow-by needs diagnosis before another turbo is installed.
Choosing a CHRA or complete turbocharger changes which turbo components are replaced. Neither choice repairs these engine faults.
How to Diagnose Repeat Turbocharger Failure From Teardown Evidence
Inspection findings should guide further checks, not become automatic verdicts. Several mechanisms can produce similar damage, and severe failure can obscure the initiating event. Contact the supplier before internal disassembly if a warranty claim is possible.
| Evidence found | Possible explanation | What to verify |
|---|---|---|
| Scored journals or bearing surfaces; embedded particles | Abrasive contamination | Oil, filter contents, feed passages, and debris from the earlier failure |
| Smeared bearing material, seizure, or heat discoloration | Inadequate oil film or excessive heat | Priming, oil delivery, oil condition, and operating history |
| Heavy thrust-face wear or excessive axial movement | Axial loading, lubrication failure, or contamination | Boost control, charge-air leaks, restrictions, and oil supply |
| Chipped or bent blade leading edges | Foreign object impact | Upstream components and retained fragments |
| Wheel-to-housing rub marks | Loss of bearing support, rotor damage, or assembly problems | Bearing condition, clearances to specification, and surrounding impact damage |
| Oil pooling with limited visible bearing damage | Drain restriction or unfavorable pressure conditions | Drain routing, crankcase pressure, and intake restriction |
| Deposits obstructing oil passages | Oil degradation or contamination | Oil history, thermal conditions, and affected supply or drain components |
A broken shaft does not, by itself, prove defective material. It may be the final result of seizure, wheel impact, or other damage.
Likewise, noise is supporting evidence rather than a teardown diagnosis. Rotor imbalance and unstable motion within an oil-film bearing are different mechanisms, but sound alone cannot reliably separate them. Record whether pitch follows load or speed and whether the noise appeared suddenly.
What to Check Before Replacing a Turbocharger
If your replacement turbo failed, complete and record these checks before opening another replacement:
- Confirm identification: Match the turbo part number, vehicle application, actuator, connections, and supplied installation instructions. Use the fitment verification guide.
- Close the previous diagnosis: Identify the suspected turbo failure root cause and the evidence supporting it.
- Restore lubrication: Correct engine oil-pressure problems; service or replace affected lines, fittings, and associated components as required.
- Remove contamination: Address oil-system debris and clean or replace affected intake, intercooler, and exhaust components.
- Check the engine: Resolve excessive crankcase pressure, fuel dilution, and relevant engine faults.
- Prepare the installation: Use specified oil, a new filter, required gaskets, and correct fastener procedures.
- Verify control readiness: Complete required actuator calibration or relearn and investigate stored control faults.
- Prime and inspect: Follow the startup procedure, then check for leaks and abnormal operation.
- Validate under controlled conditions: Once safe, compare operating readings with service specifications before returning to normal use.
The replacement turbo installation checklist can help organize this work. A documented correction is more useful than “everything looked fine.”
Build a Useful Turbo Warranty Claim
Preserve the condition of the failed assembly. Avoid cleaning away deposits, discarding gaskets, or separating internal components before asking the supplier what evidence and return procedure they require.
Document the following turbocharger warranty claim evidence:
- Identity and timeline: Invoice, part and serial numbers, installer details, mileage at installation and failure, and symptom sequence.
- Photos: Turbo identification, installed oil-line routing, connections, visible damage, leaks, and recovered debris.
- Lubrication records: Oil specification, filter identification, service dates, priming procedure, and feed-line work.
- Measurements: Available turbo supply pressure, crankcase pressure, commanded versus actual boost, and relevant restriction tests.
- Oil analysis: Sample timing, mileage, and laboratory findings for viscosity, fuel dilution, and wear metals.
- Diagnostic records: Codes, freeze-frame data, calibration work, and changes made after the original failure.
Include units, test location, oil temperature where relevant, and engine operating conditions with pressure readings. Do not restart a damaged assembly solely to collect missing data.
Oil analysis after failure may contain metals generated by the failure itself. It supports the investigation but does not independently prove the original cause. Warranty eligibility depends on the actual findings and applicable terms.
Common Questions
Why did my new turbocharger fail after installation?
An unresolved oil supply problem, leftover contamination, installation error, or engine fault may have damaged it. Incorrect fitment and boost control problems are also possibilities. Early failure alone does not prove a turbocharger defect or installation error; installation records and inspection evidence help separate the causes.
Should I replace the oil feed line again?
Follow the applicable installation instructions. Replace a line that is restricted, damaged, contaminated, or required to be renewed. A line can look clean at its ends while containing deposits internally, so blowing air through it is not enough to establish serviceability.
Can debris in the intercooler damage the replacement turbo?
The intercooler is downstream of the compressor during normal airflow, so retained debris primarily threatens the engine. Oil and fragments still need removal before startup. Oil contamination elsewhere in the engine can separately reach the replacement turbo through its lubrication supply.
Does a whining replacement turbo prove a bearing defect?
No. Air leaks, wheel contact, rotor imbalance, and bearing problems can all produce noise. Record when the sound occurs and inspect the system. Sound alone cannot identify oil starvation, oil-film instability, or a manufacturing defect.
What should I send with a turbo warranty claim?
Provide purchase and installation records, turbo identification, mileage, symptom timing, fault codes, photos, oil and filter details, and available pressure readings. Include oil analysis if obtained. Contact the supplier before internal disassembly and preserve the failed unit, lines, gaskets, and other relevant evidence.
Need help identifying a replacement? If your replacement turbo failed, contact LeadTurbo with your turbo part number, vehicle details, symptoms, and checks already completed.